Wednesday, May 29, 2013

Tomatoes Have Been Planted!


On Sunday I headed out to Stillman's to buy tomato plants. They're a farm (we were members of their CSA a few years ago), but they also have greenhouses with veggie and flower plants for sale in the spring. Over the winter I noticed that they had an insane number of types of tomatoes available for preorder on their website. I was hoping they'd also have a huge variety on hand for walk in traffic, and I wasn't disappointed! They actually had quite a few that weren't on their order form - and they have 151 varieties listed on the form!

All those plants on the left are tomatoes!
With the help of my first grader, I picked out eleven plants.


I ended up with:

Beauty. Indeterminate, 75 days. While named for its beautiful scalloped appearance, this variety is best known for ts great flavor. Manageable plants produce an abundance of large very sweet fruits.

Black Krim.  Heirloom: Indeterminate, 75 days. Hailing from Russian origins, this tomato is named for the Island of Krim in the Black Sea. Productive plants, yielding slightly flattened fruits of a rich deep purple color with almost black shoulders. Superior full tomato flavor.

Eva Purple Ball. Heirloom: Indeterminate, 70 days. A German selection, plants yield huge quantities of round juicy fruits. A great slicing variety for salads and sandwiches

Fireworks. Indeterminate. 60 days. Known for its combination of earliness, large size and eating quality, this is an exceptional selection. Productive plants.

Reisentraube. Heirloom. Indeterminate. 80 days. A German Heirloom. Reisentraube literally translates to "giant bunch of grapes" for the grape like clusters fruits are borne on. Great large tomato flavor.

Yellow Pear. Yellow pear type: indeterminate, 70 days. Vigorous vines bear loads of small, lemon-yellow pear shaped fruits. Very mild, light flavor.

Aker's West Virginia: These organic tomato seeds produce a vigorous highly productive, regular leaf, heirloom tomato plant that yields an excellent set of large, 10 to 16-ounce, deep-red, slightly flattened tomatoes in clusters of 2. Delicious, robust flavors.

Red Zebra. Plant yields huge amounts of 2-inch, red fruit with light yellow striping (or as some say, yellow fruit with red striping).

Old German. Big regular leaf plant yields 1-2 lb. beautiful fruits. Fruit color is yellow with red mottling and striping on the outside and throughout the flesh. Best color of several strains of this heirloom. 

Bush Champion. Determinate, 65 days. This big and meaty fruit grows on compact (24 in, 60 cm) plants that flower extra early. It resists Gray Leaf Spot and Alternaria well. This slicer produces 9 to 12 oz (255 to 340 g) fruits.

Sioux. Heirloom: Indeterminate 70 days.  Don't be fooled by this tomato!  Extraordinary flavor can exist in a round red tomato.  Originally released by the University of Nebraska in 1944, this variety is still popular today because of its reliable yields and exceptional flavor

Violceum Krypni Roz. 80 days. Prolific pink purple scalloped fruits.

I also had one tomato plant, planted from seed on my own, thrown into the tray with the ground cherries and tomatillos (I had more than one but I trashed them when they were tiny. I'm kind of regretting that now):

Brandywine: Heirloom indeterminate, 78 days. Considered by many to be the "best". Brandywine is the original beefsteak tomato, producing large, pink fruits with a loud tangy sweet taste. One slice covers the whole burger!

Along with the tomatoes, I also planted two hot pepper plants I picked up from Home Depot on Monday, and had one sweet pepper planted started from seed. I also planted one tomatillo plant (I ran out of room or I would have planted more!) and six ground cherries. I still have my mind set on ground cherry pies and jams galore. I had room for only four ground cherry plants in my main bed, but I tucked two more into empty spots in my raised beds, one with the peas and one with the garlic and arugula. It's kind of an experiment. We'll see how they all do in their different spots.

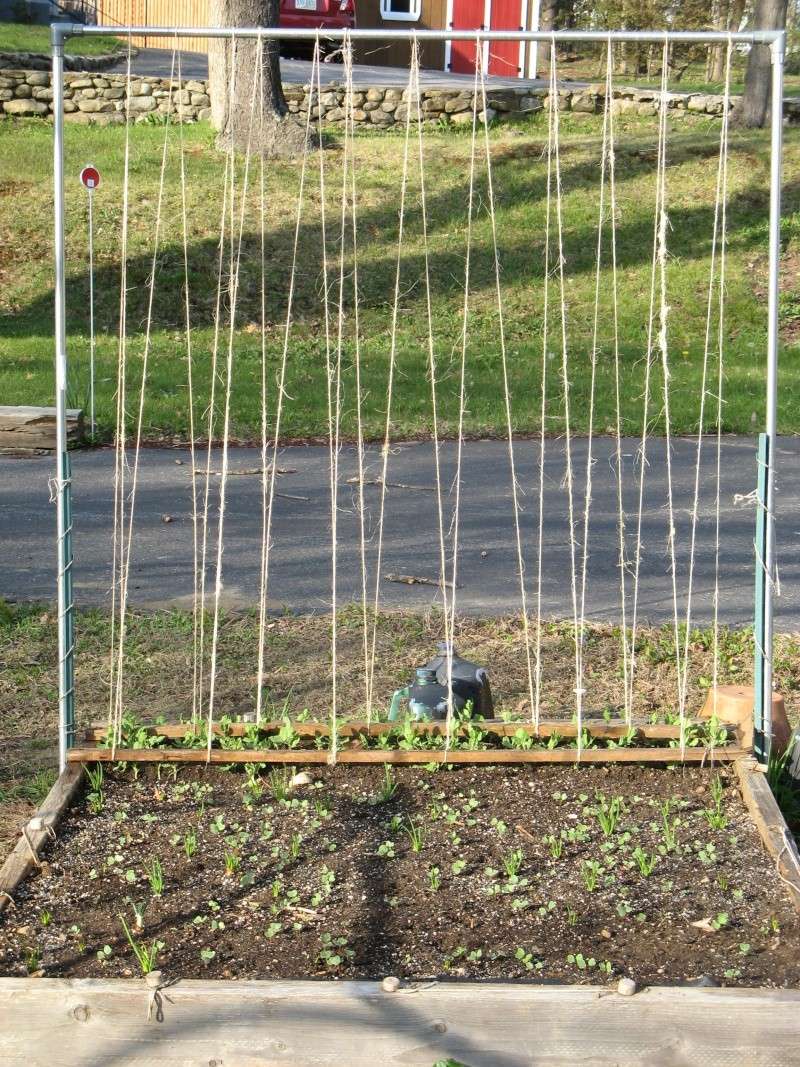
10 tomato plants in the left section, two tomatoes, three peppers, one tomatillo and four ground cherries in the middle. The right area is reserved for green beans. 
Ground Cherry with the peas (in the spot where my failed over-wintered spinach was going to seed)

Ground Cherry (on the left) with garlic and arugula. He's looking a little droopy. Maybe the garlic's too stinky for him.


Tuesday, May 21, 2013

A Little Greener

I'm long overdue for a garden update. No major news in the past couple weeks. Things have grown a little - that's about it! I am super excited though, because Saturday is our official last frost date! This means I can plant my warm season crops  -like green beans and sunflowers and cucumbers and squash! It's also the very earliest I can add my tomatillo and ground cherry seedlings into the garden, and buy/plant tomato and pepper seedlings (I have a few, but I'll need more). I may wait another week or so to do that though. Ideally overnight temps should be consistently in the 50s before planting tomato/pepper like veggies (tomatillos and ground cherries are in that category too). Looks like we're supposed to get down in the 30s and 40s Memorial Day weekend... so maybe the weekend after that?

Here's what's happening right now:


Garden as of today. Looking a little greener!

New asparagus shoots are still coming up!


Garlic, Arugula and Lettuce. The little arugula/lettuce seedlings are getting bigger!


Grapes... the posts and chicken wire we use to hold them up are a little white-trash- but soon the grapes will totally cover them and nobody will be the wiser. Some day we'll get high class wood posts for these guys.


Can you  see all the grapes-to-be?


My divided baby hostas (and remnants of Sam's chalk drawing behind them)


Baby pears!


And an update on my seedlings: Dudes, I'm so proud of how big some of these guys have gotten! No grow light required!

Tomatillos . A little leggy. I have four of these guys

They're flowering!

And a flowering ground cherry!


Brandywine Tomato.
 The above tomato plant looked like this when I repotted it on May 8th;


What a difference! Poor little guy needed to stretch his legs.  Now I'm bummed that I threw out the rest of my tomato seedlings because they all looked so sickly. Dang.

Yum Yum Gold Pepper

Ground cherry seedlings (below). The larger ones were planted 2-3 weeks before the smaller ones.  It amazes me how fast everything takes off once you put them in larger containers.  I totally learned my lesson about  the importance of potting up plants as soon as they're ready.


I got the idea to use red Solo cups as pots on youtube. My theory is that the red cups act like the red plastic mulch recommended for tomatoes, and  helps the plants grow larger faster. Tomatillos and Ground Cherries are in the tomato family - so I'm assuming they like red too. Next year I'll have to experiment and put a few seedlings in blue cups to see if there's any difference.

And finally Ninja, checking out the garden:

She seems unimpressed. Humph.


Wednesday, May 8, 2013

Garden Update

This is my garden as of this morning. It's starting to look a little greener!


And my seedlings are getting bigger! I transplanted some of them into larger cups, and those guys are really taking off. I need to transplant the rest of them - but I'm worried about having room enough on my windowsills for that many big plastic cups. The plants are spending most of each day outside now, so it might not be that big an issue.

Tomatillo (with some flower buds!):


Ground cherry:

I think that's a little bud forming on this guy too!


I have all of my raised beds planted with spring crops and perennials. I'll use the tilled bed in back for my warm weather crops (like tomatoes and the tomitillos and ground cherries!) that can be planted after the last frost at the end of May.

asparagus bed

Close up of the asparagus with a few new shoots almost ready for harvest!

I had my first asparagus harvest of the spring on Friday! I was so excited. This is my 3rd year growing asparagus. The first year you don't harvest at all, the 2nd year you harvest just a little, and the 3rd year you can harvest all you want, focusing on the shoots that are thicker than a pencil. You let the skinny shoots develop into these tall fernlike plants, the root  system gets stronger, and you end up with an asparagus producing bed for years and years to come!

Asparagus is one of the few veggies that are ready to eat this early in the spring in these parts, so I am truly psyched beyond belief that I'm managing to grow some!

First harvest of the season!
I have two beds of strawberries, and they're starting to flower.


And the peas planted in my last post are sprouting!


 The pear tree is flowering too:

Garlic's lookin' good. I planted arugula and red leaf lettuce in the empty spaces in the garlic bed. The arugula is sprouting already. Arugula is my favorite leafy green. Love the slightly spicy taste, and it's by far one of the easiest veggies to grow, and also one of the quickest to mature.

Garlic (and lots of pear petals!)

Arugula seedlings and pear petals
Remember the spinach that I planted in the fall hoping it would overwinter and come back to life in the spring to give me an awesome early harvest? Only two spinach tufts survived, and they're still pretty small.  They're in the corner of one of my pea beds. I still haven't figured out how to successfully grow spinach. I think it might involve cold frames, and I don't have one yet.

I'm a survivor!
The grape leaves are coming out.

 One of my new little hostas. It survived the dividing process!

Bleeding hearts:


Blooming rhododendron:
So fluffy and pretty!
 Raspberry:
My bleak looking raspberry area is below. I planted 10 bare root plants last spring. I had a *very*  small harvest last summer (5-10 berries!). Hoping they fill out and give me more this year. Supposedly they're invasive and can take over a yard (which honestly, I wouldn't mind at all),  so they're on the opposite side of the house from my veggie garden.

This tomato seedling isn't looking so hot. See how the leaf is brownish purple on the underside? That means potassium or phosphorus deficiency. It can happen when seedlings become rootbound, so I just repotted it and am hoping that fixes the problem.


This ground cherry doubled in size since I repotted it a week ago!
In comparison, my ground cherries and tomatillo seedlings are looking great. I was Googling last night and found that ground cherries can produce up to *300* fruits per plant (which is about what my one tomatillo plant produced two summers ago), compared to tomatoes which max out at about 21 per plant. Apparently ground cherries are weed-like and grow wild along the side of the road in warm regions of the US. They're sprawling and can take over a garden. Four to six plants is supposed to be more than enough for a family of four. I have about *ahem* 16 ground cherry seedlings. At this point I think I'll probably only keep the six healthiest. I want to save some room for at least a few tomatoes in my warm weather patch, but I also love the idea of making lots and lots of ground cherry preserves!

Friday, May 3, 2013

This Is How We Plant the Peas

I've done a lot of gardening this past week, but haven't had time to document it, so get ready for some major catch up posts!


First,  peas.  I  love peas. They may be my very favorite veggie to grow, and were the inspiration for my blog name. When I started my garden five years ago I grew sugar snaps, but since then my family and I have come to realize that we love snow peas best of all. They're sweet and crunchy like sugar snaps, and are great fresh in salads or on a veggie tray, or cooked in stir fries. In my opinion sugar snaps are almost *too* sweet. Snow peas are just right. Plus, they're perfect for my super cool pea growing method. 

Peas are vining plants, and sugar snaps and shelling peas grow tall vines, 5-8 feet long. So they definitely need a trellis. I like to use my raised beds for growing peas. If a trellis is required, it means that I can only grow peas on the north side of my raised beds, like so.

Peas planted on the north side of the bed, other stuff planted everywhere else.
 
This limits the amount of peas I can grow. I like to fill up the *entire* bed with peas. Snow peas are shorter than other varieties. Their vines generally only grow 30 inches to four feet tall. So instead of dealing with trellises and restricting my peas to the very north edge of my beds, I fill the entire bed up with peas and let them go crazy. They do end up looking slightly out of control by the time they're mature and producing like gangbusters, but they're still manageable and basically use each other as trellises and stay contained within the bed.  This isn't my picture, but they end up looking something like this:

 A little messy and slightly harder to harvest, but a pea bonanza (and I'm totally jealous of the 4/28 harvest date this person has!)

I make it my goal to plant my peas about a month before the last frost date, which around here is May 25th this year (the last full moon in May).  I planted my peas on April 27th, but if you haven't gotten your peas in yet it's not too late! Early to mid May in Zone 5 is perfectly fine. So here's my planting method:

1) Add compost to the beds, and mix it in with the rest of the soil. My beds are 4'x4'. When I first set them up they were filled with 1/3 vermiculite, 1/3 peat moss, and 1/3 compost, per the Square Foot Gardening method. This is my fifth year gardening in these beds. Each year I top them off with more compost or organic potting soil, so they're heavier on the compost now.


2) Use a yardstick to create temporary grids in the beds, creating 16 individual square foot areas. I have nails in foot increments along the side of my beds that I use as guides for creating the yardstick lines.


If you look *really* hard you can sort of see the  guideline nails in the wood framing the bed.
 3) Check to see how many peas should be planted per square foot. Looks like 8. I knew that! Really I did.


 4) Use a pencil or your finger to poke 8 two inch deep holes in each square.

 5) Find a helper to plant those seeds! Put one or two in each hole.

Go Sam Joe!
 6) Water every couple days, and get ready for a pea fiesta in just under two months!


A couple more notes on peas.  A lot of gardeners use inoculant when doing their pea planting. The way I understand it, peas have a symbiotic relationship with a special kind of bacteria found in soil, and need it to produce well. To make sure the bacteria is present, you can dip your peas in water then roll them around in purchased pea bacteria (kinda weird, I know), called inoculant. I wasn't aware of the whole inoculant thing when I started my garden, so didn't use it, and my peas flourished anyway. The Square Foot Gardening method has you fill your beds with compost from multiple sources when you first set up your garden (ie not just cow manure compost). I'm guessing that helps ensure the right kind of bacteria is in there *somewhere*.

After reading several gardening books and blogs this spring I decided to bite the bullet and actually bought some inoculant this year, but in the end I decided not to use it. It *is* good insurance if you're planting peas in bed or an area of your yard for the first time (which I'm not). It's only $5 for a bag that will inoculate 100 *pounds* of pea seed!

Say what?! Why must they make these things so complicated?

I've also heard a lot of gardeners saying they soak their peas before planting. This helps the seeds soften up and sprout earlier. I've never done that either. Without soaking, seedlings emerge in 7-14 days.  I keep things as simple as possible: no trellis, no inoculant, no soaking. It's worked for me so far! *knock on particle board*

Coming up - Ninja, the seedlings, and more garden updates.