Monday, April 29, 2013

Divide and Conquer

It's been a while, but I have updates! The weather is finally a little warmer, so I've spent a couple days outside.

The first project I tackled was dividing hostas. Back when we moved in about 13 years ago I bought some hostas and planted them with some bleeding hearts along the north side of the house. Hostas are one of the few plants that thrive in shade, and I remembered my parents having bleeding hearts on the shady side of our house growing up (Plus I *love* bleeding hearts. Who can resist those heart shaped flowers?!) Unfortunately I underestimated how many plants we needed and only got about a 2/3rds of the way to the back of the house.

See where the dirt ends?

The little bushy plant  in the above pic is a bleeding heart. I had another one, but I it was taken over by the hostas and died a couple years ago. Even though you can't see them in the picture, there *are* several big hostas there, just starting to poke up out of the soil, like so:


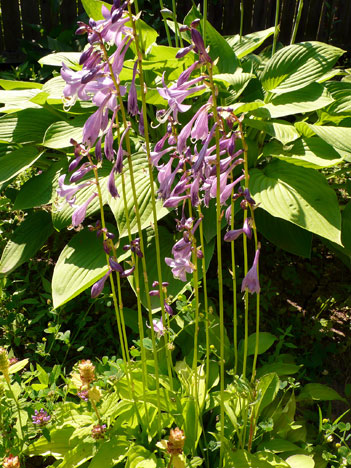
For the last couple years I've been looking unsuccessfully for the same variety of hosta to complete the border. When their foliage fills out they have solid green leaves and purple flowers, like this:


It finally dawned on me that I *thought* I remembered seeing somewhere that you can divide the hosta roots to create several smaller plants that will eventually grow into more huge plants.

And thanks to a tutorial on youtube, I was able to do just that. As it turns out this is the perfect time of year to divide them - when their spikes are just starting to emerge.

It's an easy process.

1) Pick a hosta and dig it out of the ground, being careful not to destroy the root system too much. From what I've read even if you do majorly chop the roots it's no big deal. Hostas can apparently survive almost anything.

Digging...

Digging...


Dug. And upside down.


2) After digging them up, they say you should hose them off and get rid as much of the soil between the roots as possible. Not sure the purpose of this, but I did it anyway.


Top of hosta after a partial hosing. Look at all those roots!

3) Chop the plant into smaller pieces using a big ol' garden shovel. Then hose down the smaller pieces again for good measure before planting. I cut the above plant into three chunks.


The cool thing about Hostas, is as long as you have at least one shoot attached to a clump of roots, you can plant it and it will make a new (although very mini ) hosta.

Mini hosta! Too tiny for my border, but pretty adorable.
4)  Dig holes for your new chopped hostas, add compost, and plant.


The chalk drawing on the left was done by my seven year old, Sam.


Voila!

I added another bleeding heart from my local nursery too.

OK, it's not very impressive right now, but it should look pretty awesome by mid-summer. I think I also want to add a border of medium sized rocks around these plants. we have *very* rocky soil here, so I definitely have a lot of them.

Next up, veggie garden update and pea planting!

Friday, April 12, 2013

Happy Seedlings, Marauding Cats and a Brown Garden

So the seedlings are (mostly) happy, peppy and bursting with joy!

cute li'l ground cherry


I have had a couple slight problems along the way.

Shortly after my last post I realized that I got my ground cherry and tomatillo seeds mixed up, and planted a huge area of tomatillos in the middle of my seed tray, and just a few ground cherries off to the side. D'oh! I was in kind of a rush when I planted my seeds, and as you can see - the seed packets look very similar.


I wanted tons and tons of yummy ground cherries, and not so many tomatillos, so I ended up plucking out a row of my adorable baby Miltomate seedlings (broke my heart!) and planting more Aunt Molly's.

My other major issue has been the pets, specifically my calico cat, Ninja. She likes to pull out seedlings.

Nooooooo!


Lucky for me she seems to prefer tomatoes, and so far has no interest in my precious ground cherries. She also likes to chomp tomatillo leaves, but due to my planting error I still have more tomatillos than I need, so no major harm done. She doesn't seem to like *eating* the seedlings. She plucks them, bats them around a little and that's about it - so I'm not too worried about her getting sick.

The good news is now that the plants are a little bigger she's not quite as interested in them. Still, a lot of my day is  spent chasing animals away from my seed tray.


I think this is my punishment for not getting a grow light and instead moving the tray around the house from window to window all day. I hadn't thought about about the fact that the pets would have total access to my plants that way!

Outside, things are looking a *little* greener. The garlic I planted in the fall is starting to sprout!

garlic

No sign of life in the asparagus bed yet, and the spinach I started in the fall hoping that it would over-winter and come back like gangbusters in the spring is still mostly dead.

asparagus bed


two spinach tufts (rest of the bed is just dirt so far!)

the garden - still mostly brown
We're actually supposed to get ice pellets and snow today! Spring is in the air though. I'll be out spreading new compost and planting peas in no time.

Ninja likes to help with laundry too.